Onboarding users to the Bitcoin Network is an uphill battle based on the current state of user interfaces; it simply isn’t intuitive and requires a bit of study. This is not necessarily a bad thing; like any technology, it’s a new skill at; first, that becomes second nature in a few years.
A few years ago, it was unthinkable that photo editing would be an everyday activity when you looked at Photoshop. Today, while crude by comparison, billions of people edit photos on their smartphones without a second thought.
Bitcoin will likely follow the same path as wallet software improves, as we iron out the user experience with the help of early adopters willing to take on the task of using Bitcoin and the Lightning Network in its current state.
When you explain Bitcoin to a new user, you can choose to do it without mentioning the Lightning Network, but as Lightning becomes more entrenched, you will need to provide the additional lesson.
Now I understand that for the first-time user, getting your head around broadcasting a transaction on a blockchain to a strange-looking text string is alienating enough, so bringing Lightning into the conversion only adds further complications.
So how do you ease them into it? I am no formal educator, but I will give you my strategy. The first is to explain the two consensus methods and then provide them with the easiest way to use Bitcoin and Lightning.
Bitcoin and Lightning are same, same, but different.
When you perform a Bitcoin transaction on the base chain, you must broadcast it for the entire network to review. Think of you and ten friends in a room, and you will give one of your friends $1. Instead of handing over the $1, you show everyone in the room you have $1; they all inspect the dollar bill, make sure it’s real, and then once everyone agrees, you get to hand over the funds to the friend you wanted to pay.
This is a very secure method of transfer, but it’s rather slow, it’s not going to make sense to require this security for every transaction. Imagine going to buy that cup of coffee, but before you do, you need to call over those ten friends to recheck everything before you hand over the funds for the coffee.
In Lightning, the method of transfer is different. When you have Bitcoin in the Lightning Network, instead of telling everyone you’re going to pay one of the friends in the room, you can walk over to that friend and hand them the $1; this is a direct channel payment. In some cases, your friend might be too far for you to walk to them, but you have a friend who lives close by; instead, you give the first friend the $1, and they will hand it over to the intended friend, this is a routed channel payment.
Instead of having everyone involved, you only pull in those who are applicable to ensure the transaction settles as fast as possible.
Getting Bitcoin on Lightning rails.
Now that you understand the two consensus mechanisms for moving funds around, you can start to put together the idea of a more comprehensive Bitcoin Network.
The base chain is used for larger transactions or ones requiring final settlement, while the Lightning Network is a high-speed micropayments network. You’re still using Bitcoin, only changing how you transfer funds from one user to another.
Suppose you want to interact with a Bitcoin service that supports the Lightning Network, like sending Zaps on Nostr; how do you get Bitcoin into the Lightning Network? The best way to do it is to run your own Lightning Node that lives on top of your Bitcoin full node.
Once your node is up and running, you would fund your node wallet with Bitcoin and then connect a Lightning channel using that Bitcoin. This whole process will take a bit of time, effort and technology, and if all you want to do is mess around with 10 000 to 100 000 satoshis for the first time, you’re better off using a custodial wallet that will manage the complexity for you.
The first step requires downloading and setting up a Lightning wallet on your smartphone or computer. Setting up a Lightning wallet is relatively intuitive and similar to setting up a self-hosted Bitcoin wallet, where you have your private key.
Self-hosted wallets will allow you to manage your on-chain Bitcoin, and you can choose to connect a custodial provider for your Lightning balances, such as running LNDHUB on Blue Wallet or Zeus Wallet, to name a few. You should research Lightning wallet options and pick one with the trade-offs that you feel are manageable.
Once you have a Lightning wallet, it’s time to get a Lightning balance.
Use a Lightning enabled exchange.
The easiest way to acquire Bitcoin directly on the Lightning Network is to purchase it from an exchange that supports Lightning. If you don’t mind KYC or you’re already “banking” with a VEX/CEX (Centralised Exchange), you can purchase Bitcoin as per normal, and only when it comes to withdrawing funds, select the Lightning Network option.
Provide the exchange with either a BOLT11 invoice, an LN-URL or a Lightning Address (If your wallet and the exchange support one of these Lightning transfer methods). If successful, you should see your balance on your wallet tick up immediately, and you’re Lightning balance will be ready to spend.
Custodial wallets
Suppose you still need to get more comfortable with the whole Bitcoin-hosted wallet model that interacts with a Lightning Network Service provider, or you prefer to keep your Lightning experience separate. In that case, you can choose to use a custodial Lightning wallet.
Wallets like:
- Exodus wallet (Wallet of Satoshi manages their Lightning Network integration)
- Wallet of Satoshi
- Kollider Wallet
These wallets offer users easy onboarding and allow you to send an on-chain Bitcoin transaction to these wallets, where it will automatically be converted to a Lightning balance. You can use these wallets to send to both on-chain and Lightning addresses pretty easily; with you only providing the address you need to pay, the wallet will handle the preferred routing.
These wallets are the most convenient way to use Lightning as a new user, but again always remember that when you introduce a custodian, you’re always risking funds, leaving them with a third party. So while these wallets are great for playing around with the technology, you want to limit your balance and instead pull funds on-chain should your balance exceed a certain amount that makes you feel anxious.
Swapping exchanges
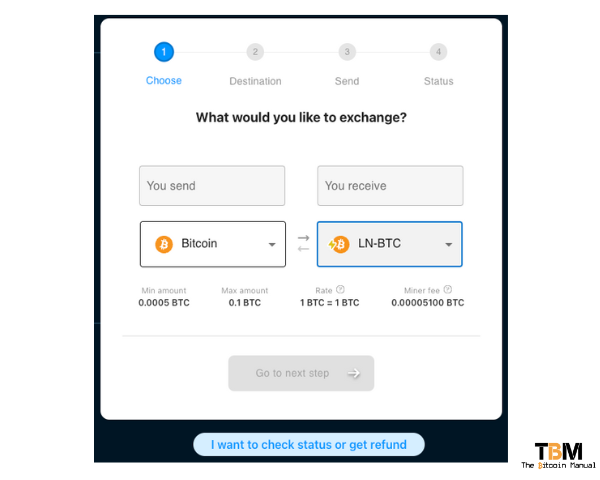
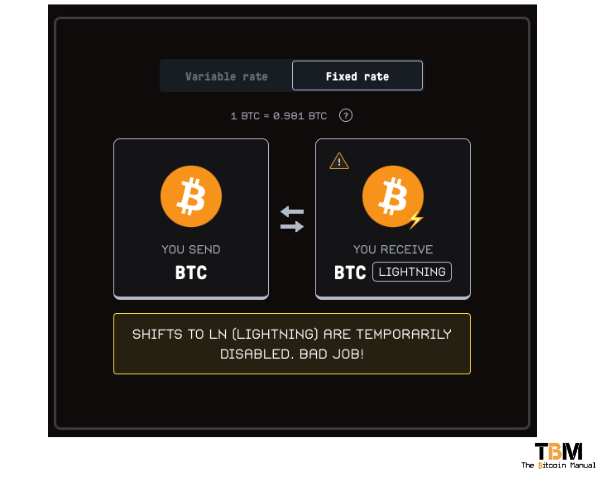
If you already have Bitcoin on-chain, or you only have access to an exchange that sells on-chain Bitcoin, you can use a swapping service to trade your Bitcoin balance for one on the Lightning Network. Once you have the Bitcoin ready, head to one of these swapping exchanges, create an order for Bitcoin to Lightning, set the amount and generate the order.
You will be asked to provide a Lightning invoice to generate the transaction, and then the exchange will return with an on-chain address you need to pay. Once the exchange receives confirmation of the on-chain payment, they will release the Lightning funds to the wallet you specified.
Boltz Exchange
- Visit boltz.exchange
Fixed Float

- Visit fixedfloat.com
Sideshift AI
- Visit sideshift.ai
P2P Swaps
If you don’t want to trust some random company with your fund’s swaps, you can opt for trusting a random individual that is offering up Liquidity for swaps and looking to net a fee for their services. Applications like Robosats allow individual traders to put up orders for swaps between on-chain and Lightning and aset a fee they would charge peers to swap their balance.
Robosats
Using RoboSats you buy or sell Lightning Network satoshis. If you want to receive satoshis over the Lightning Network in exchange for your on-chain satoshis, then you create a BUY order.
On the contrary, if you want to receive satoshis on-chain in exchange for your Lightning Network satoshis, then create a SELL order.

- Read: Guide to swaps using Robosats
Do your own research.
If you want to learn more about Lightning, use this article as a jumping-off point and don’t trust what we say as the final say. Take the time to research, check out their official resources below or review other articles and videos tackling the topic.
- What Are Hosted Lightning Channels?
- How To Open A Bitcoin Lightning Channel?
- What Is A Sidecar Channel?
- What Are Hierarchical Lightning Channels?
Are you a Bitcoin and Lightning fan?
Have you been using Lightning to make micro-payments? Stream sats or engage with apps? Which app is your favourite? Do you run a Lightning node? Have you tried all the forms of Lightning payments? Which one do you prefer?
Let us know in the comments down below.